


It’s finally here… the recipe you’ve been waiting for. I can’t even believe I’m sharing this recipe. It must be your lucky day!
This pie is one of my family’s top requests (with my Apple Cinnamon Roll Pie, of course). No matter the time of year, I get a request for this pie specifically. And the top perk? It is so, so easy!
In August, we head to the cabin and pick huckleberries. If you need to get your hands on some, read up on some tips here. We use huckleberries for a number of things depending on how many we get–jams, pancakes, cupcakes, PIE. And the great thing about this pie? It only takes 2 cups of huckleberries!
Let’s get started!

First, prepare your pie crust. Pie crust is such a particular thing, so for this recipe, I’m going to assume you have a favorite recipe. If not, let me know in the comments! I’ll get up my No-Fail Pie Crust. Remember, always use a fork to poke holes in the crust to avoid bubbling. And now would be a good time to preheat your oven to 350 degrees. This will throw together fast!


Now, throw in your huckleberries. I make this recipe with fresh or frozen berries. To be honest with you, I can’t tell the difference! If you’re using frozen berries, don’t even worry about thawing them out!

It’s time to make the custard-like filling! Simply mix the remaining filling ingredients (sugar, flour, salt, eggs and sour cream) in a bowl. And pour right on top of the huckleberries. DO NOT MIX IN WITH THE HUCKLEBERRIES.

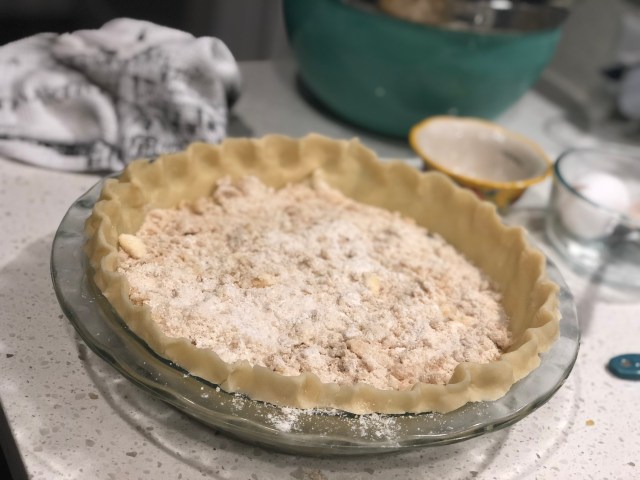
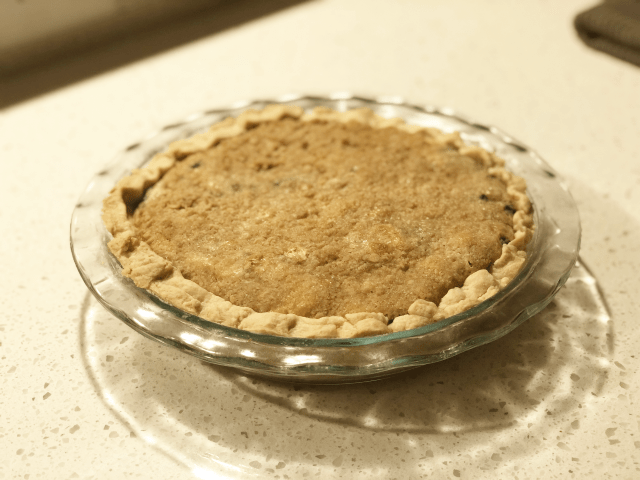
And now, you get to get your hands dirty! For the crumb, combine the brown sugar, flour and sugar. Cut the cold butter into small cubes–think six pieces per slice. Use your hands to mix the butter into the dry ingredients into a crumbly texture. Sprinkle on top of the custard. It will look like it’s not full enough, but I promise, the filling expands! My crust folds in perfectly, too (that butter crust.. yum), as you’ll see in the final photo!
All that’s left to do is bake! Throw it in the oven for 55 minutes, but keep your eye on it to avoid burning. Let cool before serving.
PRO TIP: For this pie in particular, I froze it to be served a week later at a potluck (p.s. I’m pretty sure everyone there had a piece! I came home with an empty pan). It totally works! Just bake, right from the freezer, for 30-40 minutes at 350 degrees!
If you try it out, tag me in your photos on Instagram @littlehoneyhunts.
Happy baking!
xo, Kylee
